🔍 SonarQube / SonarLint - Install, Config & Analysis
In this article, we will explore SonarQube and SonarLint, key tools for improving code quality. SonarQube acts as a central server for static code analysis, while SonarLint provides real-time feedback in the development environment. Additionally, we will see how to integrate them to maximize their effectiveness.

 SonarQube & SonarLint
Repository Reference
All the configuration files, including the docker-compose.yaml used in this article, are available in our repository:
This repository is intended to become the central place for our local development environment setup, where we will keep adding tools such as:
- SonarQube – Static code analysis (this article).
- GitHub Actions Pipelines – CI/CD workflows.
- ArgoCD – GitOps-based application deployment.
- Monitoring stack – Observability for apps.
- And more developer tools…
Each tool will have its own dedicated article with installation details, and the central article Local Dev Environment will explain how they all integrate together into a complete workflow.
What is SonarQube?
SonarQube is a powerful static code analysis tool that helps developers identify bugs, security vulnerabilities, and code smells in their projects. It provides detailed insights to improve code quality and maintainability.
SonarQube is available in different editions:
- Community Edition (Free) – Open-source version with essential static analysis features.
- Developer Edition – Adds advanced language support and branch analysis.
- Enterprise Edition – Includes portfolio management and governance features.
- Data Center Edition – High availability and scalability for large teams.
For this guide, we will use the Community Edition.
What is SonarLint?
SonarLint is an IDE plugin that provides real-time linting and code analysis. It helps developers catch issues early in the development process, ensuring consistent and high-quality code. It can be confiugured to work alone or with connection to SonarQube profiles, It functions as an extension of SonarQube when connected to the server.
Connection between SonarLint and SonarQube
- SonarLint can operate in two modes:
- Standalone mode: Works independently in the IDE.
- Connected mode: Synchronizes with a SonarQube server to share rules and configurations.
- To connect SonarLint with SonarQube:
- Ensure that SonarQube is running.
- Install the SonarLint plugin in your IDE.
- Add the SonarQube URL in the SonarLint configuration.
- Authenticate with a SonarQube token.
Database Support in SonarQube
Embedded Database (H2)
By default, SonarQube Community Edition comes with an embedded H2 database. However, this database is only intended for evaluation and personal/local usage, as it is not recommended for production due to size & data scalability limitations.
Supported External Databases
For a stable and production-ready deployment, SonarQube supports the following databases
- PostgreSQL (Recommended)
- Microsoft SQL Server
- Oracle Database
SonarQube Database Configuration Guides
Installing SonarQube Locally
-
Prerequisite: Before setting up SonarQube, ensure that Docker & docker-compose is installed on your machine. You can find the complete installation guide on the official Docker website, Docker Installation Guide: https://docs.docker.com/engine/install/
-
SonarQube Installation
To deploy SonarQube locally, we will use Docker Compose. This approach allows for future integration of additional tools and services within the local development environment. Using Docker Compose simplifies service configuration and management through a docker-compose.yaml file located in the project’s root directory.
Docker significantly simplifies the process of running SonarQube without requiring complex manual configurations. For reference, the SonarQube page on Docker Hub (https://hub.docker.com/_/sonarqube) provides links to repositories with example Dockerfile and docker-compose.yaml configurations, and instructions to install and run SonarQube with simplest command like:
docker run --name sonarqube-custom -p 9000:9000 sonarqube:community
You can then browse to http://localhost:9000 or http://host-ip:9000 in your web browser to access the web interface.
Bonus: HELM - Installation with PostgreSQL Included
For Kubernetes users, SonarQube can be installed using Helm with a PostgreSQL database included. Check out the official Helm package: (here you can find different versions at Artifact Hub) 🔗 SonarQube Helm Chart
Folder Structure
local-dev-environment/
│
├── sonarqube/                  # SonarQube setup
│   ├── conf/                   # Configuration files
│   ├── data/                   # Data storage
│   ├── logs/                   # Log files
│   ├── extensions/             # Plugins and extensions
│
├── docker-compose.yaml         # Docker Compose for multiple services
...
- docker-compose.yaml (at project root)
services:
  sonarqube:
    image: sonarqube:community # We are using the latest community version, it could also be the lts-community -(Long Term Support)
    restart: unless-stopped  # 🔄 Automatically restarts after a system reboot
    depends_on:
      - sonar_db
    environment:
      SONAR_JDBC_URL: jdbc:postgresql://sonar_db:5432/sonar
      SONAR_JDBC_USERNAME: sonar
      SONAR_JDBC_PASSWORD: sonar
    ports:
      - "9001:9000"
    volumes:
      - sonarqube_conf:/opt/sonarqube/conf
      - sonarqube_data:/opt/sonarqube/data
      - sonarqube_extensions:/opt/sonarqube/extensions
      - sonarqube_logs:/opt/sonarqube/logs
      - sonarqube_temp:/opt/sonarqube/temp

  sonar_db:
    image: postgres:13
    restart: unless-stopped  # 🔄 Automatically restarts after a system reboot
    environment:
      POSTGRES_USER: sonar
      POSTGRES_PASSWORD: sonar
      POSTGRES_DB: sonar
    volumes:
      - sonar_db:/var/lib/postgresql
      - sonar_db_data:/var/lib/postgresql/data

volumes:
  sonarqube_conf:
  sonarqube_data:
  sonarqube_extensions:
  sonarqube_logs:
  sonarqube_temp:
  sonar_db:
  sonar_db_data:
Automatic Backup of the SonarQube Database (Optional)
Even though we configured restart: unless-stopped, ensuring that data persists after a reboot, in our local environment, it’s good practice to have a backup strategy. Below is a solution using a backup service.
Manual DB Backup
- To back up the PostgreSQL database:
docker exec -t postgres pg_dumpall -c -U sonar > backup.sql
- To restore:
docker exec -i postgres psql -U sonar -d sonarqube < backup.sql
Adding a Backup Service
- Add this code to the docker-compose.yaml
  sonar_backup:
    image: postgres:13
    depends_on:
      - sonar_db
    volumes:
      - sonarqube_data:/opt/sonarqube/data
    entrypoint: ["/bin/sh", "-c", "while true; do /opt/sonarqube/data/backup_db.sh; sleep 86400; done"]
- Backup Script
Create the following script inside sonarqube/data/backup_db.sh:
#!/bin/bash

# Configuration
BACKUP_DIR="/opt/sonarqube/data/backups"
TIMESTAMP=$(date +"%Y-%m-%d_%H-%M-%S")
BACKUP_FILE="$BACKUP_DIR/sonarqube_db_$TIMESTAMP.sql"

# Create backup directory if it does not exist
mkdir -p $BACKUP_DIR

# Perform PostgreSQL backup
PGPASSWORD="sonar" pg_dump -h sonar_db -U sonar -d sonar > $BACKUP_FILE

# Clean up old backups (optional, keep only the last 5 backups)
ls -tp $BACKUP_DIR | grep -v '/$' | tail -n +6 | xargs -I {} rm -- "$BACKUP_DIR/{}"

echo "Backup completed: $BACKUP_FILE"
- Grant Execution Permission
- Run the following command to make the script executable:
chmod +x sonarqube/data/backup_db.sh
Conclusion
- SonarQube and PostgreSQL are configured with persistent storage.
- Containers automatically restart unless manually stopped.
- A backup service is set up to create database backups automatically.
This setup ensures a robust SonarQube environment for local development. 🚀
Running SonarQube
Once the files are in place, follow these steps to start SonarQube:
- Build the SonarQube image
docker-compose build
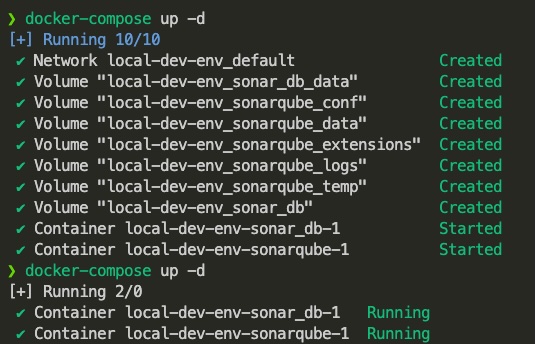
- Start the SonarQube container
docker-compose up -d
- Access SonarQube UI
- Open http://localhost:9001 in your browser.
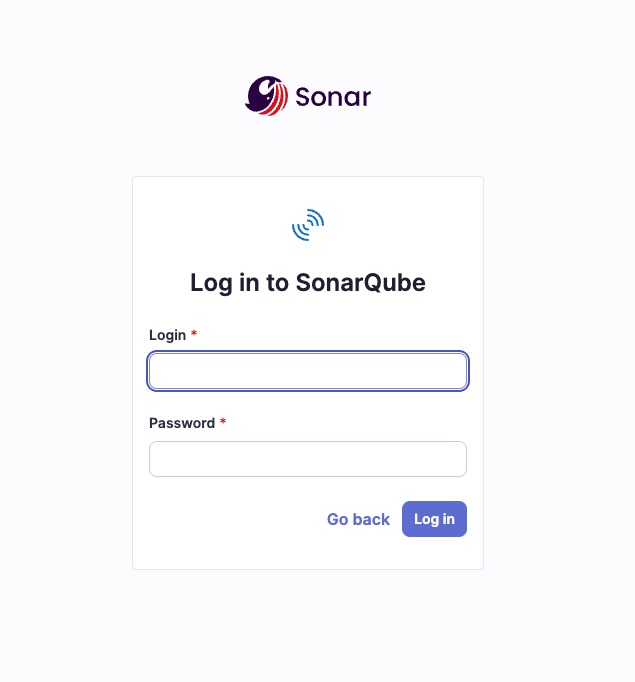
- Login Credentials
- Username: admin
- Password: admin
Installing and Configuring SonarQube for IDE (fromerly SonarLint)
Installation
To install SonarLint in your IDE
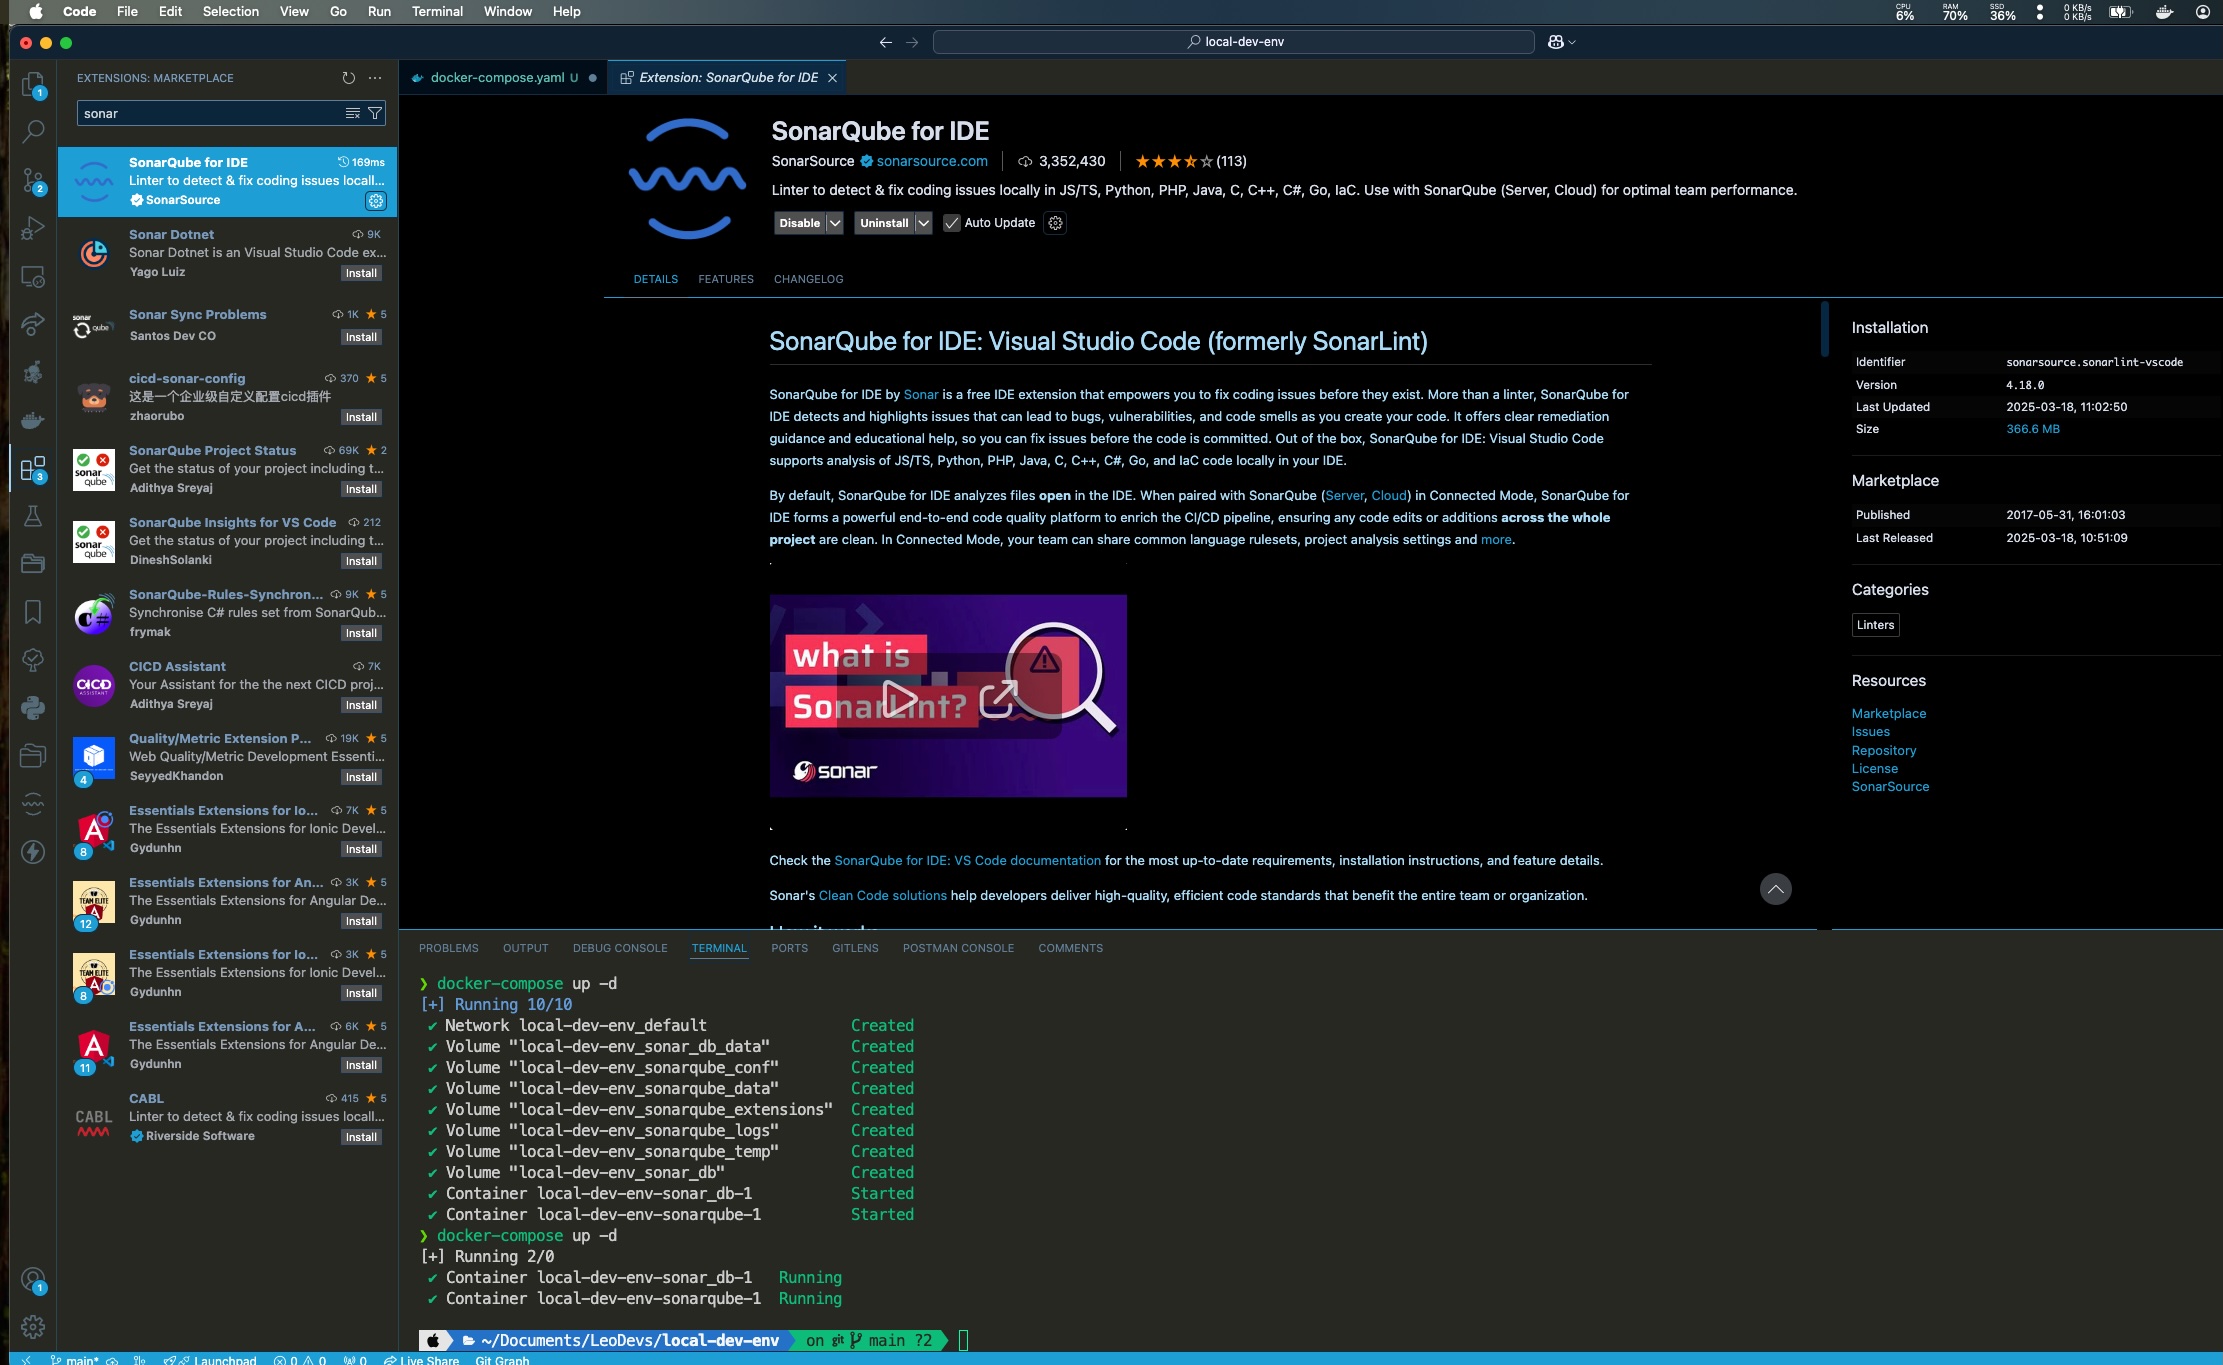
- VS Code: Install the “SonarLint” extension from the Extensions Marketplace
- IntelliJ IDEA: Install the “SonarLint” plugin from the Plugins Marketplace.
- Eclipse: Install the “SonarLint” plugin from the Eclipse Marketplace.
Vs-Code Example
Using SonarLint in Standalone Mode
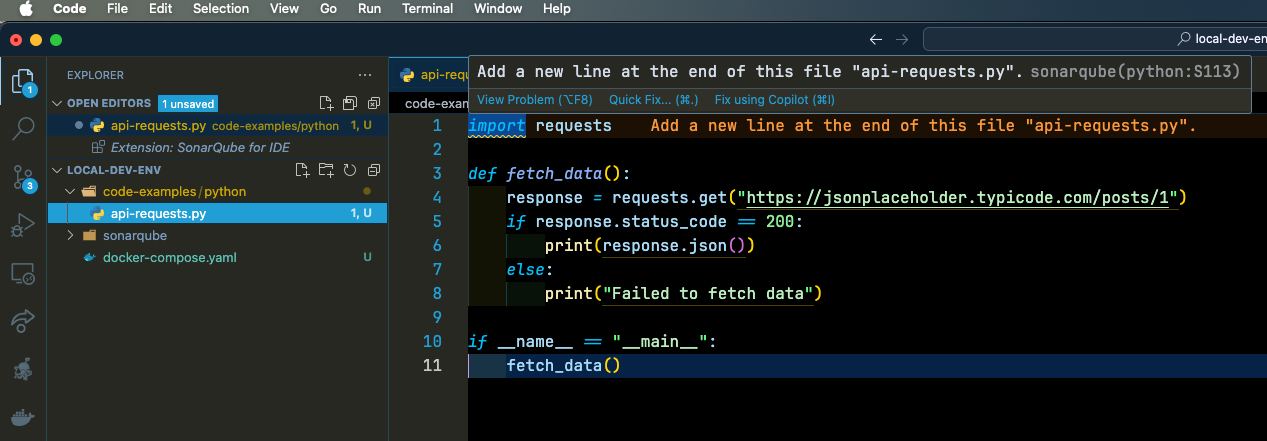
SonarLint can work independently without connecting to a SonarQube server. In this mode, it provides static analysis using its built-in rule set.
For example, after installing SonarLint in VS Code:
- Open a project.
- SonarLint will automatically scan the files for issues.
- Hover over a warning to view explanations and possible fixes.
This is useful when you want quick feedback without setting up a full SonarQube instance.
Configuration in Connected Mode
To connect SonarLint to SonarQube:
Open the SonarLint settings in your IDE.
Select “Connect to SonarQube or SonarCloud.”
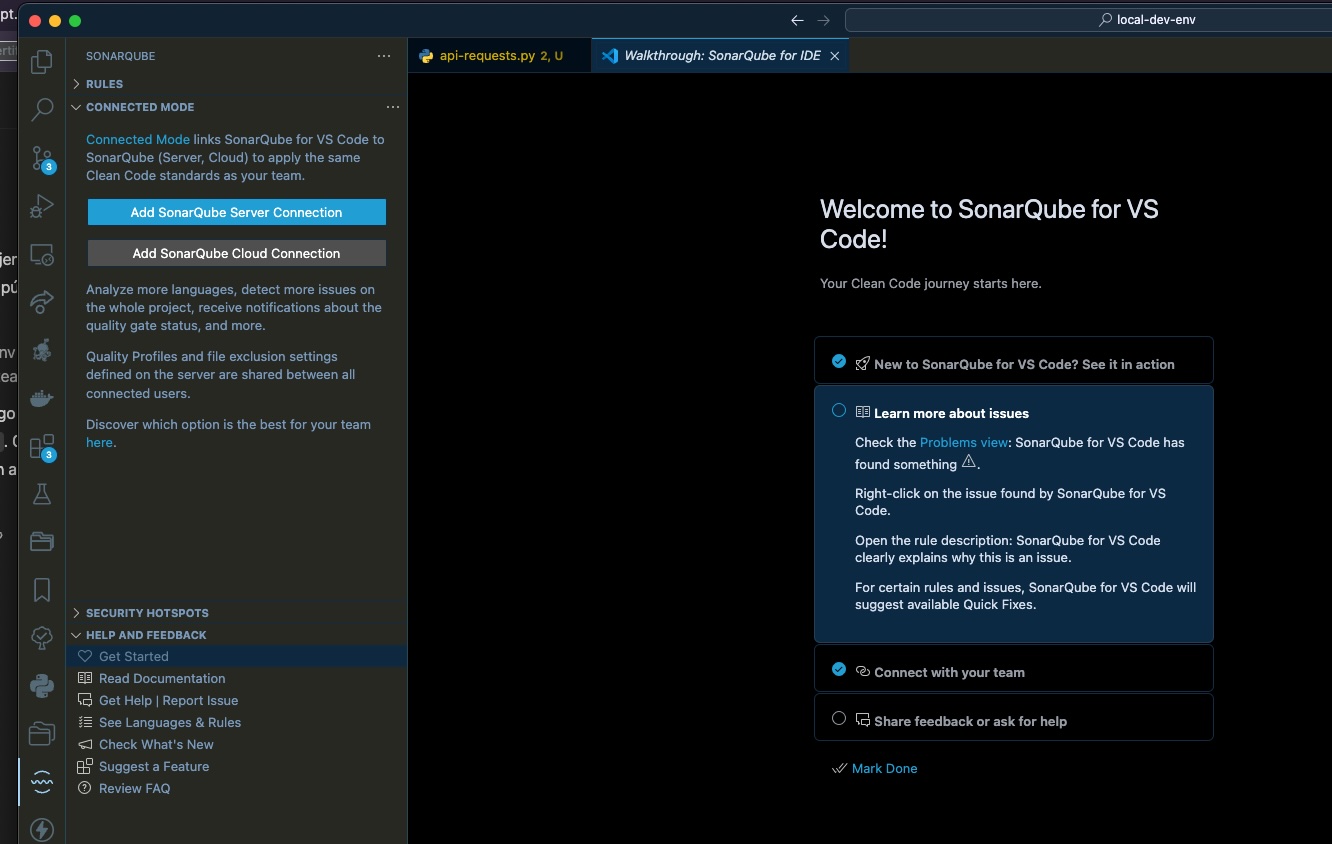
Enter the SonarQube server URL (e.g., http://localhost:9000).
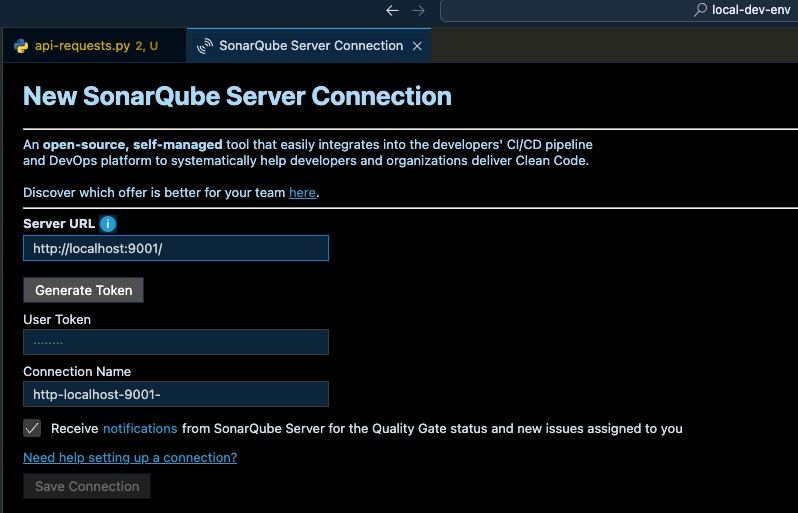
Authenticate using a SonarQube token. (Or allow access from your Sonarqube instance)
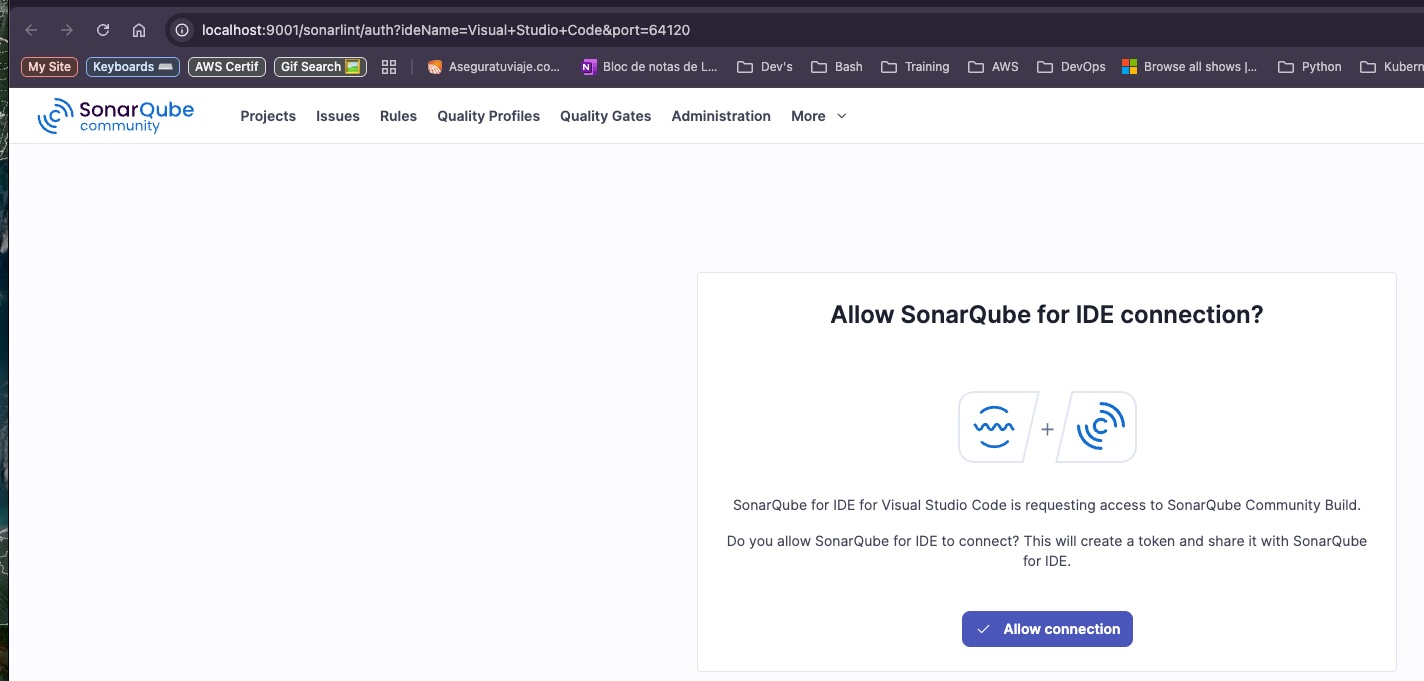
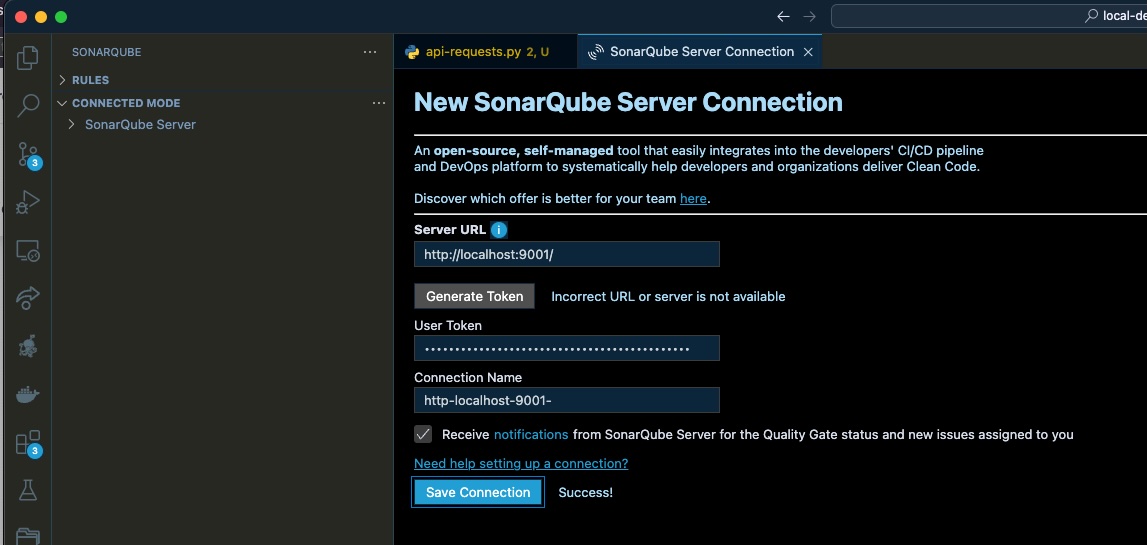
Select the project to synchronize the analysis rules.
Example of SonarLint in Action
Open a code file in your IDE.
If there are issues, SonarLint will highlight them with warnings and suggestions.
Hover over an issue to see details and possible fixes.
If connected to SonarQube, the rules from the server will be applied in real-time.
With this setup, you have a functional SonarQube environment with persistence and an external database. Additionally, SonarLint enhances your development experience by providing real-time feedback. Now it’s time to analyze your code!
Next Steps
In this article, we focused on installing and configuring SonarQube with Docker Compose.
This is part of a broader series about building a local development & testing environment.
In the following articles, we will integrate additional tools such as GitHub Actions pipelines, ArgoCD, and monitoring solutions.
When we introduce ArgoCD, we will also show how to migrate SonarQube from Docker Compose to Kubernetes and manage it through GitOps.
Stay tuned — our development environment will keep evolving step by step! 🚀